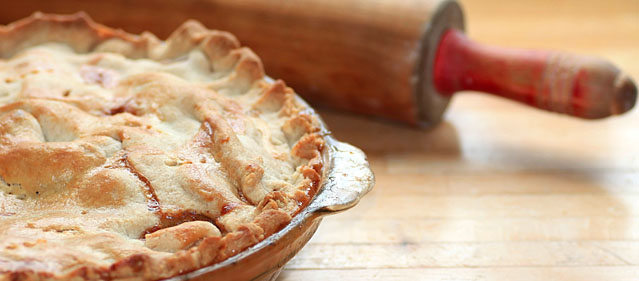
Of all the foods that grace our holiday tables, pie ranks as the fourth favorite, one notch ahead of turkey stuffing. This year, over 730 million slices of pie will be served in restaurants alone. Yet, it’s homemade pie most of us crave. Here are eight tips to get a perfect, flaky crust.
The Right Proportions
Most pie crust recipes were formulated 40 or more years ago, when a standard pie plate was 8″ or 9″ in diameter and fairly shallow. Many pie plates today are deep dish and 10″ in diameter. If you use a standard recipe for a larger pie plate, you will have to roll your crust too thin. Make sure you use a recipe that’s sized for your pie plate. The proportions in the recipes below are correct. If you have scraps left over, bake them off and eat them with a sprinkle of sea salt.
Double Crust for an 8″ or 9″ Pie
2-1/2 cups all-purpose flour
1 teaspoon salt
1 cup shortening, cut in half-inch cubes
1/4 to 1/2 cup ice water
Double Crust for a 10″ or Deep Dish Pie
3-1/4 cups all-purpose flour
1-1/2 teaspoons salt
1-1/2 cups shortening, cut in half-inch cubes
6 tablespoons to 3/4 cup ice water
You Must Use Lard
Of course butter wins in the flavor department, but you will not achieve the MOST flaky pie crust without lard. Before you turn your nose up at the idea, keep in mind that lard has only a third as much cholesterol as butter and only half as much saturated fat! Lard is softer than butter and bit more challenging to roll out, which may explain why so many people prefer butter. If you can’t give up on butter, use half lard and half butter in your recipes, and replace the butter with lard as your skill increases. Butter should be used straight from the refrigerator, while lard should be used frozen. Note that natural (organic) lard is much healthier than the mass-market variety. Vegetarians…use Crisco!
Blend by Hand
Do not use a food processor to blend pie crust. Flaky crust is made when bits of shortening the size of small peas melt into the flour, leaving crisp little pockets of air. Food processors cut the shortening too fine to make this happen. To cut shortening in by hand, use a pastry blender, sharp knives or a mezzaluna. When it’s time to add the water, use a fork or your fingers, and blend just until the crust will stick together when you press it.
Refrigerate
There’s a lot of misunderstanding about refrigerating pie crust. The shortening bits should be cold and solid when the pie goes into the oven, so if your crust has warmed during mixing and rolling out, you want to re-chill it. Recipes often suggest refrigerating the crust before rolling, but it’s almost impossible to roll out cold pie crust without overworking it. There are two times when you can re-chill the crust. The first is after the shortening has been cut in but before the water is added. The second option is to roll out and shape the bottom crust, refrigerate it while you roll out the top crust, then refrigerate the top crust while you fill the bottom crust.
Use a Pastry Cloth
Roll your crust out on a pastry cloth or sturdy linen towel that has been well dusted with flour. Dust the top of the crust lightly before you roll it, and flip it over from time to time to make sure it isn’t sticking to the cloth. When it’s time to transfer the crust, pick up the entire cloth and gently flip or slide the crust into the pie plate.
Handle with Care
The goal of every pie maker is to mix, roll out and get the crust into the pie plate with as little handling as possible. Even if your crust cracks apart when you roll it out, patch it instead of re-rolling it. Since lard is softer than butter, a crust that uses lard easier to repair than a butter crust.
Vent
Don’t forget to cut vents in the top crust. Use a paring knife to make a small cross in the top and bend each of the four corners back. Make several slits in the crust as well. This is to release steam created inside the pie as it bakes. If steam can’t vent, the crust will toughen.
Don’t Bake Too Hot
Many recipes call for baking at 425 or 450 degrees for the first 15 minutes, and then turning down the heat. This is outdated advice that dates back to the days when people used very soft home-rendered lard. Beginning on high heat is unnecessary, and often results in an over-browned crust. Most pies should bake at 325 to 350 degrees F.
Above all, don’t be afraid of pie crust. The more often you make it, the easier it becomes, and soon you’ll be wowing friends and family with holiday pies, summer fruit pies and delicious pot pies all year long.
